
Please find information about how to use the My Study Group app here
For English version – click here: Facilitator My Studygroup guide
For Danish version – click here: Underviser_My Studygroup vejledning
Re-use your study groups from a previous course: My Study Group export to new course (Danish version)
My Study Group (facilitator)
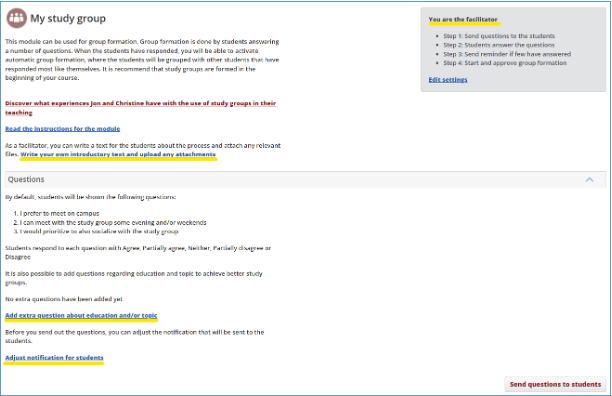
My Study Group is a tool in Absalon for matching students in study groups prior to their study start. The division is done via an algorithm that matches the students based on their answers to 3 basic questions. This is a guide for you as a facilitator.
The process is overall as follows (everything takes place directly in the tool)
- You send a message to the students to start the group formation process
- The students answer the questions
- You can send reminders to students who have not yet responded
- You start the group formation process
- The algorithm places the students in groups based on the similarity in their answers
- You approve the algorithm’s suggestions for groups (alternatively edit the groups manually)
- Students are automatically notified of their groups and the other group members
My Study Group in Absalon
If My Study Group is not already showing in the menu you click on Settings -> Navigation tab, drag the tool and place it in the navigation menu. Remember to click Save.

The role as a facilitator
- Click on My Study Group. The first teacher to click on the element now becomes the facilitator
- (If you are not a facilitator to start with, you can choose to take the role afterwards)
- The page briefly describes the purpose of the My Study Group tool and shows the 3 questions
- Your tasks as a facilitator are listed in the right corner (you have the option to edit some important settings, look under the screenshot)
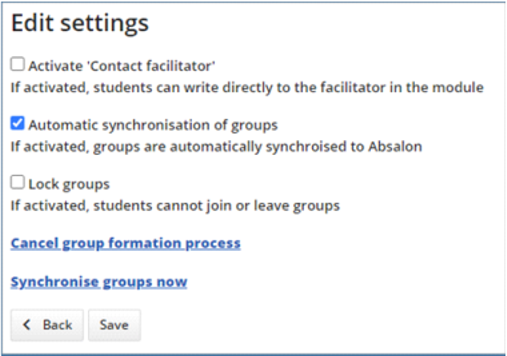
- You can switch off “write to facilitator” so that the students cannot contact the facilitator
- You can opt out of automatic synchronization of groups. When synchronization is switched on, My Study Groups creates and maintains the study groups as groups in Absalon that can be used for e.g. assignments. If changes are made to the groups directly in Absalon, the changes will be overwritten by My Study Groups and therefore it may be relevant to switch off synchronization.
- You can lock groups if, for example, there are mandatory groups.
- You can cancel/reset group formation processes that have already been started, if they have been started, for example by mistake (be aware that any formed groups are lost).
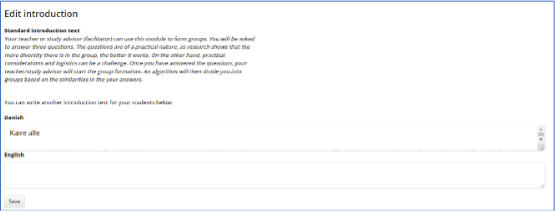
Writing your own introductory text
You can also choose to write an introduction of your own choice, which will be shown to the students, when they click on the tool.
- If you want to write a different text than the generic one (below) then click on Write your own introductory text.
Adding extra questions
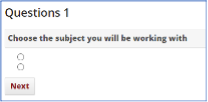
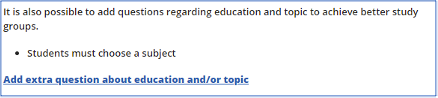
You can add 2 additional questions (subject and education) that the students must answer in addition to the 3 basic questions. If subject and/or education is used, please note that the algorithm prioritizes matching on the basis of these answers over the answers to the 3 basic questions. This means that matching is based on the similarity in students’ answers.
- You can add 2 additional questions (subjects and ecucation) by clicking on Add extra questions about education and/or subject
- If you want to add eg. ”Question on subjects”, you need to fill in the alternatives, which the students can choose between . If you forget to fill out alternatives, the students will be met by 2 ”blank” options.
Before filling out the options:
After filling out the options:
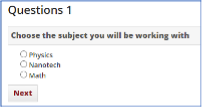
- Adding subject as a question will look like this on the facilitators page
My own notification to the students
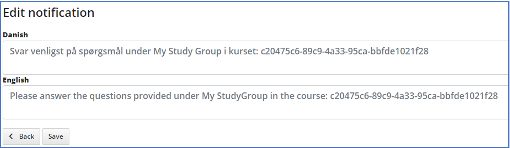
- If you want the change the generic notification, that students receive in their inbox in Absalon, then click on Adjust notification for students.
- Remember to hit Save when you have finished
Send out the questions to the students
- When you are finished writing your own notification hit Send questions to the students
- After clicking, you will see a summary of the introductory text and the message that the students see. If it can be approved, click on

Waiting for the students’ answers
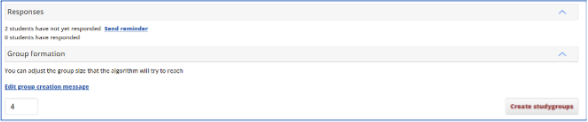
- You can follow the progress of the students’ answers
- You can send reminders to those who have not yet responded
- You can adjust the group creation message (that the students receive when the groups have been formed)
- You can adjust the group size, if necessary
Create study groups
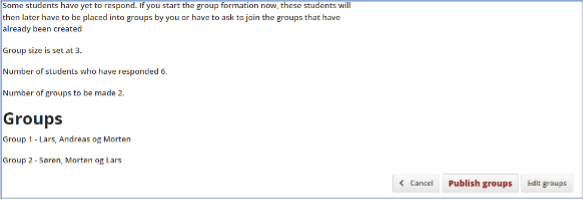
When the students (or most of the students) have responded the group formation process can begin. The algorithm will form groups based on the similarity in the students’ answers (appendix 1 gives a more detailed and technical explanation of how algorithm works)
The overview below gives a preliminary status showing the number of replies, the group size and the number of groups/members
- You can now choose to either publish groups as they are or edit groups if necessary (this is explained on the next page)
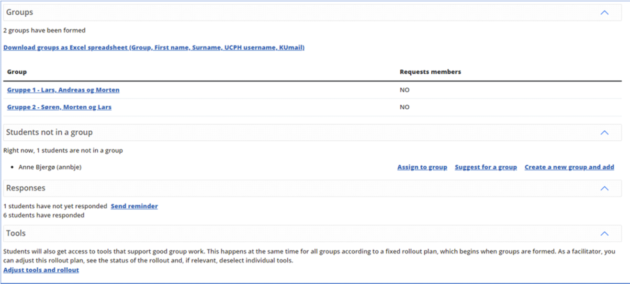
Published the study groups
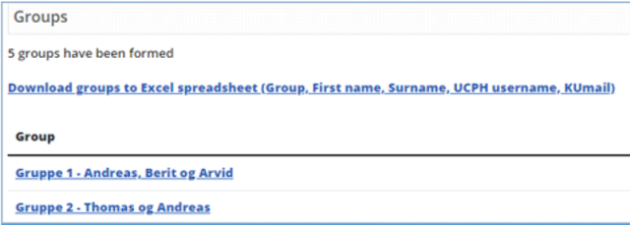
When you have published the groups, you get an overview of the formed groups and the members
- You can also send reminders to students who have not yet responded
- You can choose to directly assign students without a group to a group (if they have not yet responded to the questions), suggest the student to a group or create a new group
- You also have the option of automatically distributing students – who have not answered – randomly into newly created groups
Editing groups
You can edit the groups if you are not happy with the composition of the groups or if you for any other reason need to change them by dragging/dropping students, removing entire groups and creating new ones.
- Make the necessary changes
- Click on Publish groups afterwards (be aware that this cannot be undone)
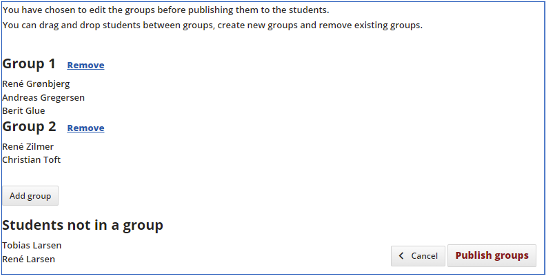
- If you wish to remove students from formed groups, click on the group and then remove
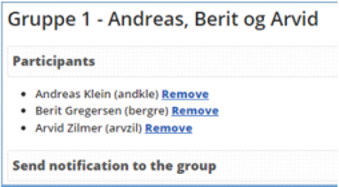
- You can then assign the removed person to another group.
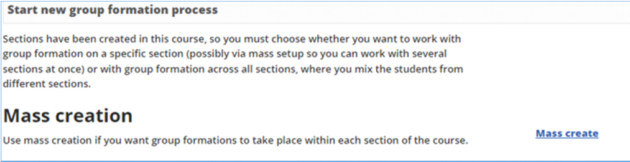
Setup via Mass creation
If sections have been created in a course and you do not want to mix students from the different sections, you can via the mass setup function form groups on the entire course but without grouping students from different sections. Mass creation allows you to edit and adjust the setup for all sections at once, so you do not need to access each section separately and adjust the setup.
- Click on mass creation
Now you can work with the different default texts, in the same manner as when setting up a single section
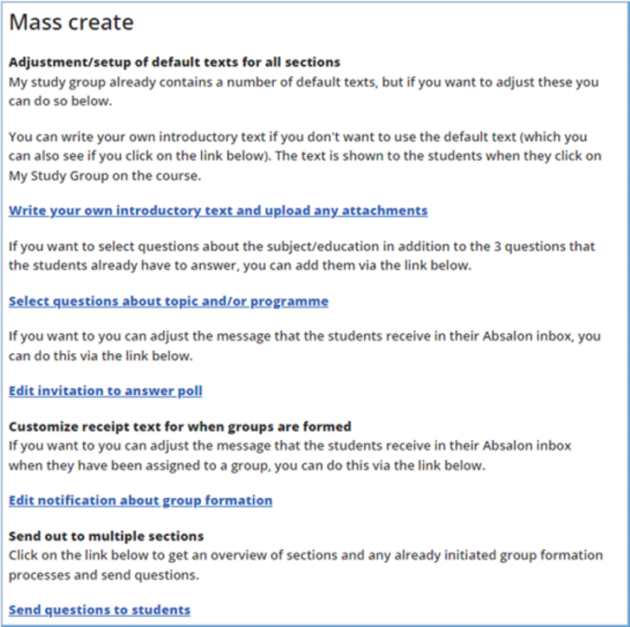
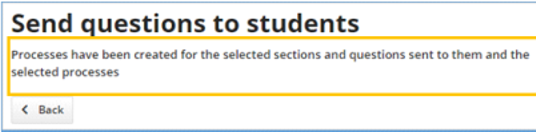
Sending questions out to the students via mass creation
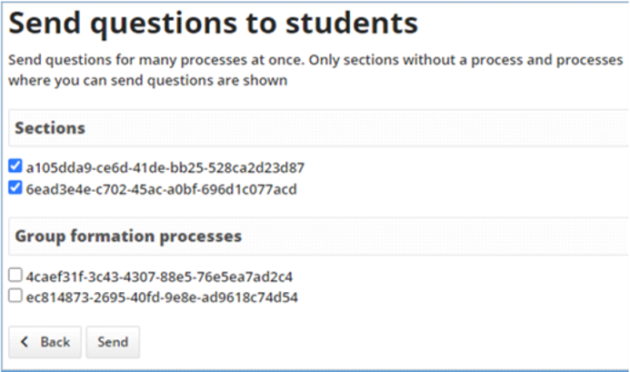
When you have clicked on “Send questions to the students” you will be given the opportunity to “check” the correct sections. (If group formation processes have already been initiated on selected teams, they are displayed under Group formation processes).
- Click on Send
Appendix 1 – Group formation algorithm
You can find the appendix in facilitator guide to My Studygroup